Cross-compilation
Cross-compilation occurs when a device compiles source code for a different platform than the one that compiled the code, we usually have a development environment that is in an architecture different from the architecture of the board on which we will run our program. So that our notebooks or desktops can generate a binary, a program that runs on another architecture, there is the Cross Compilation. For example, in our case, a computer with Linux Ubuntu, using an Intel or AMD processor with x86 architecture, will compile code for the embedded computer running an adapted Linux system running on a completely different architecture.
Using cross-compilation to work with embedded systems is very common, especially when they do not have the processing capacity to support a compiler. For us, it would be possible to compile in the embedded system itself, however, although the resources are not so limited, we do not want to waste them. In addition, programming on a regular computer with several different IDE types is much better than programming on an embedded computer with limited interface capabilities.
To accomplish this cross-compilation process must first obtain a Software Development Kit, also known as SDK or devkit. The SDK is nothing more than a set of software development tools that make it possible to create and compile software for a different system.
Installing the SDK
Note
The Yocto project offers a tutorial on how to obtain and install the SDK for your system on the GitHub Cross Compile with Yocto SDK page. However, all the procedures performed and the results obtained in the installation will be described in this topic.
To obtain the SDK for the image of OS we are using, simply perform the following procedures:
- Creation of directories
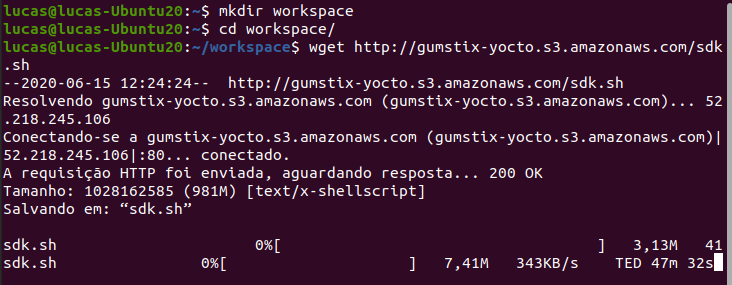
We will create a directory called workspace where you will install the SDK and compile the codes in the future. Choose a location convenient for you and execute the commands.
$ mkdir workspace
$ cd workspace
$ wget http://gumstix-yocto.s3.amazonaws.com/sdk.sh
Note
The wget command will download the SDK for Gumstix systems. This process may take a while, depending on your download speed.
- Checking permissions
After the download is complete, check the file permissions by running the command ls -la sdk.sh. If the terminal returns that you are allowed to run this file, skip to the next procedure. Otherwise, you will need to change the file’s permissions using the chmod command.
Note
Recalling, the first three spaces indicate the owner’s permissions and, basically, we have 3 basic permissions, r, w and x, indicating permission to read, white and execute, respectively.
For example, in the image below, the file has read and white permission, but cannot be executed.

To add the permission to run, just execute command chmod +x sdk.sh.

- Installation
To start the installation, run the sdk.sh file. Once prompted, enter the directory you want to install the SDK in (we recommend creating a repository called sdk) and confirm.
$ ./sdk.sh

- Setting up the environment
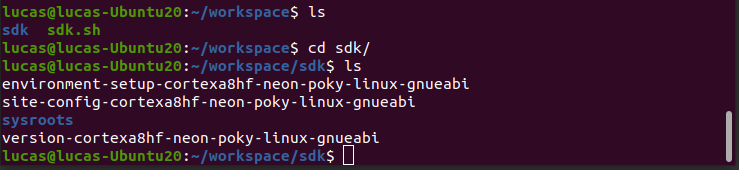
Installing the SDK will generate a folder with the content shown in the figure below.
Note
The “sysroot” directory contains the root files of the two systems, both the system that will compile the code and the system that will run the program, and the first file in the list imports the adrdresses and variables important for compiling the code.
In order to proceed with the compilation of the code it, is necessary to execute the following command line:
source sdk/environment-setup-cortexa8hf-neon-poky-linux-gnueabi

Compiling Hello World
Once the installation is done, we can test the cross-compilation by creating a simple script. Let’s create a file in the text editor called “helloworld.c”, paste the code below and save it in the workspace directory.
#include <stdio.h>
int main(void)
    {
    printf ("Hello World!\n");
    return 0;
    }
We can now run the command make <code_name> to create an executable binary file from helloworld.c.

Note
The make command is actually a simplification of an extensive command line that calls a arm-poky-Linux-gnueabi-gcc compiler and gives it the parameters contained in the SDK folder. All this thanks to the “source” command previously used.
Once the code executable is obtained, just copy it to one of the memory card folders and transfer it to Overo and execute it. Remember that the main directory is the /home/root/ directory, so if the file is placed inside this directory it will be very easy to find it.
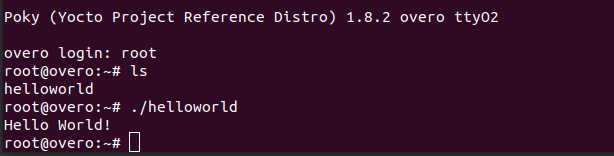
After inserting the memory card in Overo, we can start it normally. When started, we go to the directory where the program was saved and run it with the command ./helloworld. If everything goes well, the program should be executed, similar to the figure below.
References
- PITA, H. C. Desenvolvimento de sistema de comunicação multiplataforma para veículos aéreos de asa fixa. Faculdade de Tecnologia, Universidade de Brasília, 2018.
- Cross Compile with Yocto SDK - github.com/gumstix