Obtaining images from the Yocto Project
In order to perform the Yocto Project operating system initiation process on the Gumstix embedded computer, we need three specific files, they are the first stage of the initiation system, the MLO (Minimal Loader) file, the second stage of the initiation system, the file u-boot.img (the acronym comes from Universal Bootloader), and the image of the system, which in our case will be Yocto 1.8.2 with Linux kernel.
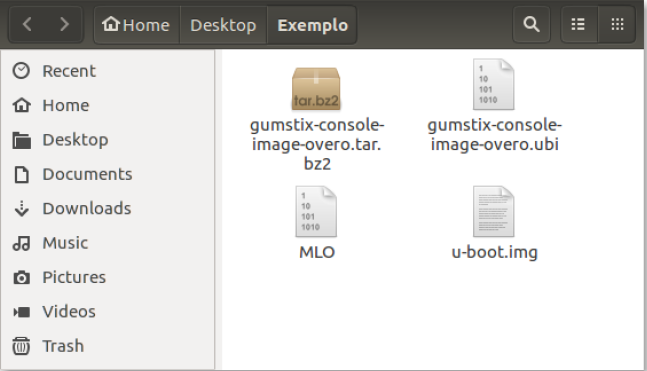
The figure shows an example of the files described in the previous paragraph, note that, in this case, there is also a compressed folder that contains the root files of the operating system. The simplest way found to obtain these files and the operating system image is by following the steps in the README.md file of the Yocto project repository for Gumstix products. The advantage of using this method instead of simply obtaining the ready image of the operating system is that if necessary, we can modify it.
This tutorial explains how to manually build the image of the Yocto system and perform all procedures through command lines of the Linux terminal, with an emphasis on Ubuntu 14.04 (LTS). However, to perform this step it is highly recommended to comply with the requirements indicated by the Yocto project.
System Requirements
Note
For more information regarding system requirements, see System Requirements - Yocto Project Reference Manual.
The development of projects in the Yocto Project environment requires that some requirements are met, they are:
- A system with a minimum of 25 GB of free disk space running a supported Linux distribution. If the host system supports multiple cores and threads, you can configure the Yocto Project build system to significantly decrease the time required to build images.
- Appropriate packages installed on the system used to perform the builds.
- A distribution of the Yocto Project.
Project Yocto is currently supported on the following Linux distributions.
- Ubuntu 12.04 (LTS)
- Ubuntu 13.10
- Ubuntu 14.04 (LTS)
- Fedora release 19 (Schrödinger’s Cat)
- Fedora release 20 (Heisenbug)
- CentOS release 6.4
- CentOS release 6.5
- Debian GNU/Linux 7.0 (Wheezy)
- Debian GNU/Linux 7.1 (Wheezy)
- Debian GNU/Linux 7.2 (Wheezy)
- Debian GNU/Linux 7.3 (Wheezy)
- Debian GNU/Linux 7.4 (Wheezy)
- Debian GNU/Linux 7.5 (Wheezy)
- Debian GNU/Linux 7.6 (Wheezy)
- openSUSE 12.2
- openSUSE 12.3
- openSUSE 13.1
Note
For a more detailed list of distributions that support the Yocto Project, see the Supported Linux Distributions section in the Yocto Project Reference Manual.
To build the operating system image, the build system must have the following versions of software Git, tar and Python.
- Git 1.8.3.1 or greater
- tar 1.27 or greater
- Python 3.4.0 or greater
Note
See the Required Git, tar, and Python Versions section in the Yocto Project Reference Manual for information.
In addition, it is recommended to update the Linux repositories. To do so, in the case of Ubuntu distribution, just run the following command:
$ sudo apt-get update && sudo apt-get upgrade
It is also necessary to install the essential host packages to build the image. The following command installs host packages based on systems with Ubuntu distribution.
$ sudo apt-get install gawk wget git-core diffstat unzip texinfo gcc-multilib build-essential chrpath socat libsdl1.2-dev xterm curl
Note
To install host packages on other supported Linux distributions, see the Required Packages for the Build Host section in Yocto Project Reference Manual.
Configuring the Image
Note
The operating system used to test the commands was Ubuntu 14.04 (LTS).
Linhas de comando Linux para obtenção e montagem da imagem.
- Installing the repository
To download Yocto images, we first need to install the repo command. In summary, the repo is basically a git wrapper, which provides a simple way to group several different git repositories into a single project. If you are interested in more information about the repo command, go to repo - gerrit.googlesource.com.
Download the scripts from the repository
$ curl http://commondatastorage.googleapis.com/git-repo-downloads/repo > repo
Make files executable
$ chmod a+x repo
Move files to the system path
$ sudo mv repo /usr/local/bin/
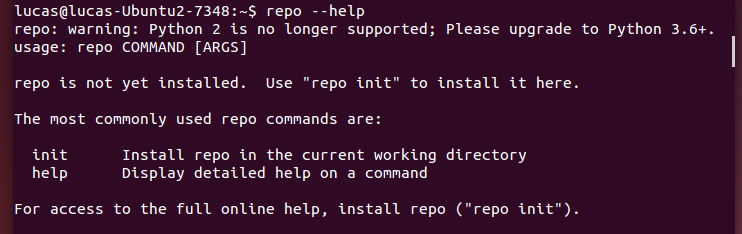
If everything goes well, a message similar to the image should appear when executing the following command. This command is not mandatory.
$ repo --help
- Creating a local repository
Create a directory for the files and change the execution directory for the new repository.
$ mkdir yocto
$ cd yocto
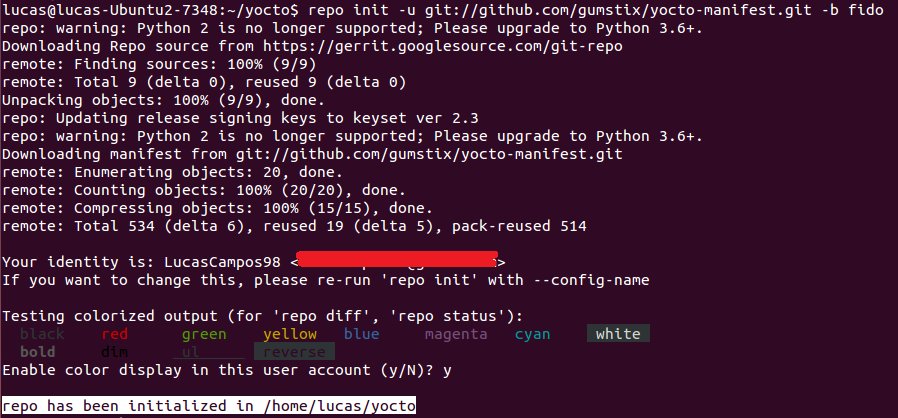
Now with the repository already installed, we will download all the Yocto settings for our project. The init command can take some time, as it downloads all the git repositories associated with the project. The command -b specifies the branch to be used and the command fido selects the most stable branch of the repository.
$ repo init -u git://github.com/gumstix/yocto-manifest.git -b fido
A successful initialization will end with a message stating that .repo has been initialized in your working directory. Your directory should now contain a * .repo * folder where the repository control files are stored, but there is no need to open the directory.
- Downloading the files
The following command is used to ensure that all of your repositories are up to date and is useful for updating your Yocto settings if you do a build later.
$ repo sync
Note
This step can take more than 20 minutes, depending on your internet connection.
Force all temporary files to be written to permanent devices using the command:
$ sync
- Starting the Yocto Project Build Environment
Warning
If, for any reason, you cancel the activity before completing the Yocto compilation, you will need to execute this command each time before proceeding to the next steps. Keep in mind that this also applies to future builds.
Now that we have our basic Yocto settings, we will enter our build environment. Using the following command, we will copy the default configuration information into the poky/build/conf directory and set some environment variables for the image assembly system.
$ export TEMPLATECONF=meta-gumstix-extras/conf
$ source ./poky/oe-init-build-env
Note
This configuration directory is not under revision control, so you can edit these configuration files for your specific installation.
- Creating the image
The Yocto project uses bitbake to compile the Yocto Linux image. Bitbake basically compiles only the OS, kernel, modules and all packages included in the target Linux OS.
Tip
(OPCIONAL) If you are familiar with compiling via make, you can speed up the compilation process by telling bitbake to compile with more threads. This step is not necessary, but if you are compiling on a system with a high-end CPU with many cores, it will speed up the compilation time. For example:
$ export PARALLEL_MAKE="-j 8"
The number “8” indicates the number of nuclei to be used in the matching. It is worth mentioning that you should not specify a value -j greater than the amount of CPU cores present in your construction machine.
So, to download the source codes and compile the system images, run:
$ bitbake gumstix-console-image
Note
This process downloads several gigabytes of code and then makes a huge build. So, make sure you have at least 25GB of free space. This step may take a day or more to create the image, depending on your internet connection. Don’t worry, it’s just the first build that takes a while.
After completing the execution of all commands, it is recommended to check the folder yocto/build/tmp/deploy/images/overo, this folder must contain binary kernel files and bootloaders and root directory files in the format .tar.
The figure below shows an example of the contents of the described folder, this folder must be like the one obtained after performing the previous procedures.
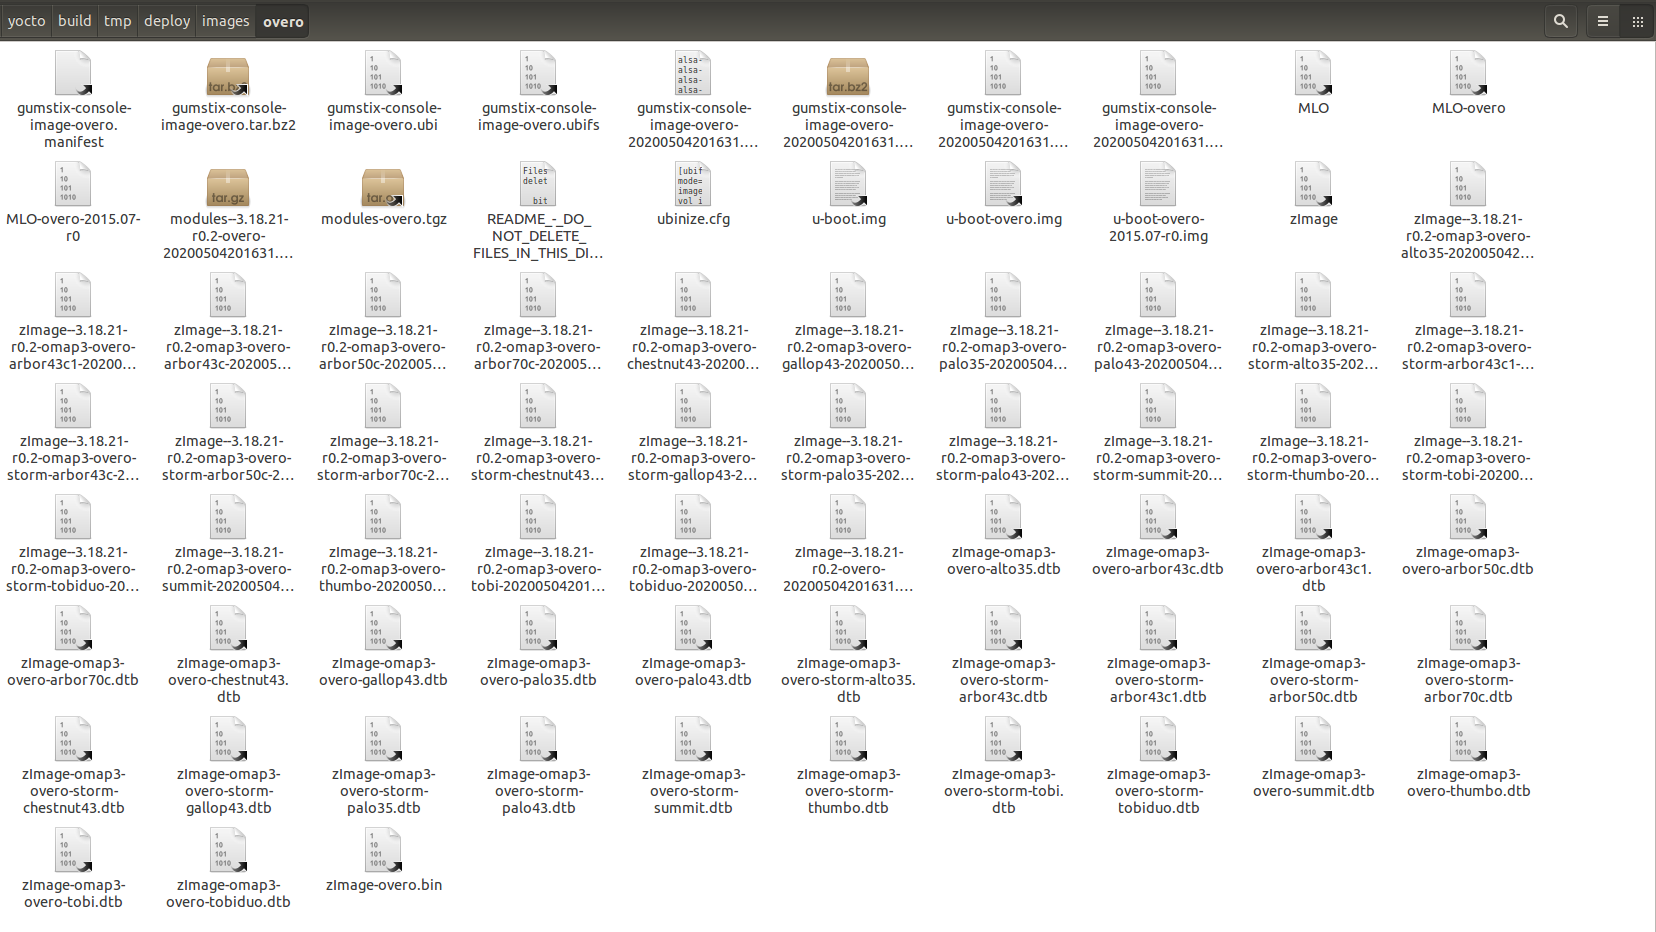
In the figure we can find both the necessary bootloaders described previously and the binary (.ubi) and files in the root directory of some versions of the Yocto project.
Warning
Possible causes of failures are probably related to missing or outdated software, unsupported operating system or lack of free space.
References
- PITA, H. C. Desenvolvimento de sistema de comunicação multiplataforma para veículos aéreos de asa fixa. Faculdade de Tecnologia, Universidade de Brasília, 2018.
- Gumstix Repo Manifests for the Yocto Project Build System - github.com
- Yocto Project Quick Start - yoctoproject.org
- Yocto Project Reference Manual - yoctoproject.org
- Building Yocto Linux Images for the Gumstix Overo - hackgnar.com